Thursday, January 6, 2011

Track Day Driving Techniques

Tight Corners and Hairpins
At the opposite end of the spectrum is the very tight, continuous-radius corner, which might vary from something greater than 90 degrees to a tight 180-degree “hairpin” where you will be completely reversing your direction within a fairly short distance.
In the case of the tight corner, all the aspects of the standard 90-degree corner apply, but must be performed to an extreme. You need to slow down significantly and will probably drop two or even three gears, you need to wait to make your turn-in until you can exit the corner on almost a straight line, and you need to make a very late apex on the corner.

We can take the aspects of the turn one at a time. The first step will be to brake hard to reduce speed, while at the same time downshifting. On many racetracks, hairpins are often found at the ends of long straights, so that a period when the car is at its maximum speed in its highest gear is followed immediately by a turn that requires that the car be moving at a very low speed in its lowest practical gear.

Needless to say, this transition takes a lot of practice, but these types of corners reward the good driver with excellent equipment and solid driving experience. At almost any track, this corner will see the greatest number of changes of position, since the corner is often almost a game of chicken, with the drivers seeing who can wait the longest before hitting the brakes, knowing that the driver who brakes last will be the first out of the corner, provided he or she has left enough room to slow the car sufficiently to be able to get around the corner.

Typically in these corners, the turn-in point will actually be past the apex point, and the apex point itself will be well past the geometric turning-point of the corner. All of this is necessary so that the driver has the maximum distance over which to accelerate. The drivers who turn in early have to wait until they are completely around the corner before they can begin that drag race to the next corner. Such drivers are generally passed by the driver who turns later, but gets back up to speed earlier.

On these turns, the trick is to look around the corner, and wait until you can see well around the track before making your turn. It is not unusual to feel as if you’re looking over your shoulder in an open car before you can see your line out of the corner and begin your turn. In a closed car, you’ll probably be looking out the side window for your cornering line before beginning the turn.

Once you’ve slowed down and made your turn, then all that’s left is to begin accelerating and wind the car up through the gears. In a normal rear-wheel car you might actually induce a little rear-end slide to bring the rear end around. In a MINI, by lifting off the throttle for an instant once you’ve begun your turn, you may be able to release the rear end. Then when you get back on the throttle you can use your speed to pull you around the corner.

Changing Radius Corners

In our modern world of carefully-engineered highways and geometric city streets, most corners have the same curve from the beginning to the end. For these corners, once you’ve turned the steering wheel, you can usually hold it at the same angle until you are through the corner. However, on back roads which were probably laid out to follow the contours of land or the boundaries of some farmer’s property, it is not unusual to encounter a corner that surprises you half-way through by changing its curvature.

On road tracks, such corners are much more common. Track designers delight in making things difficult for the driver who is new to the track, or new to track driving, and the folks who lay out autocross courses positively delight in making things as difficult as possible. Two such corners are typical, ones that become more open as you go around them, and ones that become tighter as you go around them.

The first types are called “increasing radius corners.” On public roads, these are usually a positive surprise, since you find that you can get on the accelerator earlier and harder than you had expected when you entered the corner. On the track, they can be disconcerting because it usually means that you didn’t need to have slowed down as much as you did on the entry and could have been going even faster on the exit.
But in general, they’re not of too much concern for safe driving since it isn’t likely that you’re going to find yourself in an unexpected precarious situation coming out of the corner.

By contrast, corners that become tighter, with progressively smaller curvature, as you go around them can be quite dangerous. These corners, called “decreasing radius” corners, can deceive you into carrying too much speed on the entry. As the corner begins to become sharper, you realize you are going to have to turn the steering wheel tighter in order to keep from running off the road, but realize that if you do you may lose control of the car.

When driving an unfamiliar road, the best way to avoid this situation is to go more slowly, of course, and particularly wait until you are further into the corner before making your turn. That way you can see more of the exit and be able to gauge your speed more accurately.

However, if you do find yourself in the situation of having to turn the wheel more tightly after entering the corner, the worse thing to do is to follow your instinct and try to slow down by abruptly letting off the gas and hitting the brakes. If you do this, the car’s nose will go down, making it even harder to get the car to turn, and you may very well find yourself going straight off the outside of the curve.

Instead, you need to try to keep the car as balanced as possible. Try to keep the car going at the same speed while as gradually as possible turning the steering wheel more sharply. If the situation was serious, you’ll be rewarded by hearing your tires squeal as they start to slip a bit, but 99 times out of 100, you’ll be all right.
Few people outside the realm of professional high-speed driving ever push their cars anywhere near their limits of adhesion or roll-over potential and all that will happen is that the car will scrub off speed as the tires slip a little. The car will make it around the corner without any problem, though you and your passengers may find your hearts beating a little faster when you’re through.

It’s the alternative that’s usually where trouble arises. When you see a car off the road, or worse on its side or top on the side of the road, you can pretty much assume that the driver got into a difficult situation, started to slide off the road, then either jerked the steering wheel hard or jammed on the brakes, or both, and wound up putting the car into a skid or roll.

It’s worth remembering as you mentally prepare for decreasing-radius corners, that you are driving a MINI with its front-wheel drive. On the positive side, you can usually power your way around a decreasing radius corner by using the throttle and front wheels to pull you through. On the negative side, the MINI is more likely to bite you if you take your foot off the throttle, or worse, hit the brakes. This action will cause the car’s weight to transfer to the front wheels and off the rear wheels, and it’s very likely the rear end will skid out to the outside of the corner, leaving you facing the wrong way or worse.

Learning to handle tight and decreasing radius corners is where some practice in advance can pay dividends, and one of the reasons why some track time or autocrossing is a good idea even if you never expect to do any competitive racing. The first time your tires start to squeal, you’ll be startled, but you’ll begin to get some confidence in the car’s ability to hold on to the pavement at speeds well beyond what you would have expected. You will also get a little more confidence in your ability to catch and correct a difficult situation without panicking and making it worse.

Of course, if you’re working on improving your line around a track, and you’re going to be taking the same decreasing radius corner again in two or three minutes, it is a simple factor to adjust your speed and turn-in point so that you start your turn a little later, and a little more slowly the next time around so that you can take the corner without scrubbing off speed and be able to accelerate more quickly coming out of the corner.

.. stay tuned for more..

Track Day Driving Techniques

first off.. let me say that there were some technical issues.
they have been worked out.

www.minimania.com

... back to the good stuff...


Track Day Driving Techniques
With some practice on the track, or on the autocross course, or prefereably both, and some focused attention to your driving techniques while on the road, you should be getting a feeling for driving a high-performance automobile well. So, now we’ll start playing with your head a little more by adding some complications to the simple process of getting your car around the corners without fuss or muss.

Types of Corners

Let’s start with the fact that, once you get out of the artificial blocks of city streets, very few corners occur as neat 90-degree angles with the same width from curb to curb on the exit as on the entry. Curves can consist of long, gentle sweeps that allow high speeds but reward patience, tight turns that require heavy braking and a very slow entry to avoid running out of road, or combinations of the two that start out tight and then open into sweepers, or worst of all, corners that start out as fairly high-speed sweepers and then surprise you by tightening up. Add to that corners where the pavement slope helps your turn, or at the opposite extreme, seems to slope the wrong way especially just when you want to increase your speed, and you’ve got a fistful of new concepts to learn.
But don’t despair. The concepts you’ve already been working on mastering, including controlled weight transfer, slow-in and fast-out, braking and downshifting, selecting your turn-in point, apex, and exit, will continue to apply. The exceptions we’ve just mentioned, and will now discuss in more detail, are just actually just variations on what you’ve been doing.

Sweepers
Let’s start with the corner that is potentially the most fun, the long sweeper. The major difference between this and the basic corner we discussed in the last chapter is that you don’t have a specific apex point where you get off the brake and then roll hard on the throttle. Instead, after completing your braking and making your initial turn, you will find yourself holding the wheel at one angle for what seems like a long time.
The important aspect of this turn is that you are helping your car stay balanced by using the throttle. Instead of pushing hard as you unwind the steering wheel, you’ll hold the throttle at close to one point, and try to keep the car balanced from front to rear without accelerating or decelerating.
Actually there generally is an apex to this type of sweeping curve, but it is a long way after the turn-in point. You can tell when you’ve reached the actual apex, because you realize that the track or road is starting to straighten out. At that point, you can start to straighten out the wheel while beginning to press the throttle harder to start accelerating.
So the key thing to remember on a long sweeping curve is that there is a fourth segment: the period when you are balancing the car using the throttle, maintaining more or less the same speed as you come around the curve. One tip on these corners is to continue to look as far around the curve as possible. This will help you keep a continuous turning radius, and will also give you the opportunity to see when you can begin to straighten out the car.

stay tuned for more...

Friday, October 1, 2010

Protecting the Old Noggin when driving a MINI Cooper

Under the heading of protecting vital components, you’ve discovered by now that a safety helmet is required for most track days and autocross competitions. If you’re getting tired of grabbing a smelly, old beat-up driving helmet from the pile on the pit wall, or using that motorcycle helmet you borrowed from your neighbor, you might want to think about getting a decent driving helmet of your own.
There are two types of helmets that are generally accepted for casual autocrossing and track days: motorcycle helmets and automobile racing helmets. The major difference is that motorcycle helmets are not made of fireproof materials and consequently are not acceptable for any kind of sanctioned auto racing.
Within both categories of helmets, there are open-face and full-face helmets. Full-face helmets are designed to provide full protection in open cars, and are somewhat safer for all applications, but are heavier and less comfortable. Open-face helmets are legal for use in closed cars in most sanctioned events, and will be lighter and more comfortable, but don’t offer as much protection against facial burns in the event of a car fire.
A general factor to consider when selecting a racing helmet is the material with which the helmet is made. Basic helmet shells are generally made of fiberglass, which is perfectly safe, but is heavier than high-tech composite materials. Generally, the lighter the helmet, the more expensive it will be. If you don’t expect to use the helmet often or be wearing it for very long at any one time—such as in autocrossing—the cheaper one may be just fine.
Another factor to evaluate in picking out the helmet is the size of the facial opening. This is largely a matter of personal preference, though helmets with smaller openings will be slightly safer. If you always wear glasses with your helmet, or get a little claustrophobic, you may prefer the largest opening you can find.
No matter what, you want to check the “Snell Rating” that is required by virtually all santioned racing organizations. A Snell-rated helmet is certified for compliance with accepted safety standards by the Snell Institute and carries a cetification sticker on the inside of the helmet under the lining. The sticker will have an S, followed by an A for automobile or M for motorcycle, followed by two digits, indicating the rating year.
The Snell Institute is an independent, non-profit group that tests driving and riding helmets for safety, giving its rating to those that pass. The standards are changed periodically, and it is generally accepted that helmets become less safe as they get older, so the Snell rating number is changed every five years. Most organizations accept a helmet that was certified within the last ten years.
To be sure that you have an acceptable helmet, the last two digits should be 00 or 05, indicating the helmet was certified after 2000 or after 2005. Be sure to check this rating if you get an opportunity to buy a second-hand helmet from someone else.
Keep in mind that the protection in a safety helmet comes from compressible foam between the shell and the liner, and that foam can only be compressed once before it looses its protective capability. If you do buy a used helmet, make sure that there is absolutely no indication of any damage. A helmet can look all right, but if it’s been dropped, then the inside foam may have been compressed to the point where it will no longer offer any protection.
When you’re buying your helmet, you want one that is Goldilocks-right, not too tight and not too loose. For this reason, you should consider buying one in person, rather than just ordering one through a catalog. The correct size should be very snug and actually a little tight to get on, but you shouldn’t feel any uncomfortable pressure points that would give you a head-ache in a long on-track session. Once the helmet is on, you should try pulling the back up. A correct helmet shouldn’t move much, certainly not enough so that your vision is obscured. Similarly, grasp it under the chin and pull up. It shouldn’t move unless your head moves. To find the correct helmet, you may need to try several brands. Considering the price of brain surgery, the difference in prices shouldn’t matter much to you.
Typical helmets can cost as little as $250, or as much as $1000, depending on material and design. Of course, the sky’s the limit on costs for those fancy helmets you see the professional drivers wearing on Speed Channel. But then, they have been custom-molded to fit the individual driver’s head, equipped with radio equipment, and given that trick paint job. Whichever you buy, make sure that it is certified, and that it gives you a snug but comfortable fit, so that you get your money’s worth.
Safety Belts
For autocrossing and casual track-day events, you will need only the standard three-point safety belts with which your MINI is equipped. However, for added safety and better times, you may want to seriously consider purchasing a supplementary belt system with shoulder straps as well as lap belts that can be clipped into your regular safety belt system.
One good example of such a belt system is the Schroth Profi II Flexi Competition Belt, which is available through racing and MINI aftermarket suppliers. The biggest advantage of this system is that it will give you much more stability in active autocrossing. Instead of having to brace yourself with your hands on the steering wheel and your legs against the interior panels, the safety belt system itself will keep you positively anchored into your seat.
The nice thing about this system is that the lap belts fasten to the same points as the stock front belts, and the shoulder belts snap into the regular stock belts in the back seat. One drawback is that the shoulder belts come up at a pretty steep angle from the rear clips. This won’t be a major issue in keeping you in place, and won’t even make much difference in a slow-speed collision.
However, we wouldn’t recommend these belts by themselves for use in highway use. In the event of a high-speed collision, the force of your body against the shoulder belts would likely result in severe spine compression, probably causing a more serious injury than you might sustain with the stock three-point belt.
There is a fix for this problem, however. Most of the same suppliers from which the Schroth belts can be purchased can also supply a harness guide bar from Stable Energies that will fit the MINI Cooper S. This bar fastens across the car and attaches to the clips of the shoulder portion of the standard three-point seat belt. Then the shoulder portion of the auxiliary belts is fastened to the guide bar to prevent spinal compression in the event of a high-speed collision.
The four-point auxiliary harnesses are available for under $250, and the guide bar can be purchased for about $100. They are legal in all SCCA autocross classes and will probably contribute as much to lowering your lap times during your first year of competition as any piece of speed equipment that you might buy.
For the person who participates in occasional track days and time trials, the combination of the four-point clip-in system and a guide bar would probably be marginally safer, and also help maintain car control. However, we should note that this system probably wouldn’t be accepted for wheel-to-wheel competition use on the track. When you’re ready to get involved in motorsports at that level, you’ll want to install a roll bar or roll cage set-up, with a full five- or six-point racing harness.

Thursday, February 11, 2010

Increasing Reliability and Safety of your MINI Cooper

If you are thinking seriously about extensive touring, perhaps on less-than-smooth backroads, or you’re going to be doing much track time, sooner or later you will probably find yourself hitting a bump in a road, or taking an unintended off-track excursion. To insure that you don’t do any serious damage, you may want to think about protecting mechanical components under the car that are vulnerable to damage from uneven road surfaces. This protection will be even more important if you have lowered the car by installing high-performance springs and shocks.

You’ll also want to think about protecting the single most valuable component in the car on the course or road. That’s your head, of course. In this chapter we’ll give you some tips on buying a good helmet to protect your noggin.

Protecting the Soft Underbelly of your MINI


In the days when Paddy Hopkirk was racing the original Minis on long-distance European road rallies, one of the first modifications that was made by the factory was the addition of a sump guard—sometimes called a skid plate—under the car. The sump guard, as you might expect from its name, was primarily intended to protect the oil sump, the lowest portion of the engine, from being damaged. Such protection was critical, since the original Minis had their transmission under the engine, in the sump, with lubrication coming from the engine oil.

Even though new MINIs don’t have their transmissions under the engine, if you were to run over a large rock in the road, or some other obstruction when sliding off the road, it is just as important to protect the underside of the engine, including the oil pan, wiring, and fluid pipes. Stock MINIs do have a plastic sump guard, but those are largely designed to deflect stones thrown up by the wheels, rather than providing heavy-duty protection against large obstructions.

Mini Cooper Forum

At least one supplier makes a solid steel sump protector that replaces the stock plastic guard. The design is also improved, extending further under the engine than the stock plastic piece. This piece essentially acts like the skid plate on a rally car, protecting the underside of the engine and transmission from damage, if you run over a rock or debris in the road, or a high-center section on a bad backroad.
In particular, the steel sump protector the power steering cooling fan which, on pre-2004 cars, is exposed under the car. On these early models, any kind of obstruction that gets into the fan can stop it, which will blow a fuse that protects the fan’s circuitry from overheating. However, when the fuse blows, it effectively shuts down the power steering, leaving the driver to wrestle the car back under control with only manual control.

We should note that the 2004 models and later have been modified so that the cooling fan circuit is separate from the power steering circuit, so you won’t lose the steering assist should the fan be damaged. In addition, a plastic guard was added to protect the power steering fan, which is certainly better than nothing.
The steel skid plate sump protector sells for approximately $120 and is straightforward to install, though it does require that the car be jacked up or placed on a lift to provide access to the underside of the engine.
Should you decide not to install the sump guard, it is still a good idea to protect the fan on any of these models. To do this, a drilled stainless steel guard has been developed by aftermarket suppliers that can be attached on earlier models to protect the fan, or used to replace the plastic guard on later models. The power steering fan shield sells for less then $50 and is very easy to install.

Wednesday, September 23, 2009

High-tech Spark Plug Wires for your MINI Cooper


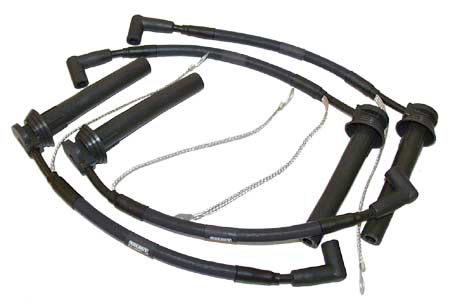
Interestingly, some high-tech spark plug wires can provide an alternative to the Plasma Booster to accomplish the same task of increasing the intensity of the spark produced by the spark plug and thus provide the same benefits.
The Nology company makes a set of spark plug wires that each incorporate a capacitor and separate ground connection. With this addition, the spark plug wire itself stores up the energy of the spark until it reaches a high intensity level, then releases it in a shortened burst that provides a quick, clean ignition of the fuel/air mixture.
The manufacturer claims an increase in spark intensity of over 300 percent, which measurably increases horsepower and mileage, and reduces emissions by providing more a complete burn of fuel. An added benefit is that the substitution of the high-tech spark plug wires is legal under California Air Resources Board regulations.
The Nology spark plug wires sell for $199 for the set, and can be ordered in red, blue, yellow or black for that added eye appeal in the engine compartment. Even better, they can be installed without any special tools.

Sunday, August 30, 2009

Finding a Few More Horses for your MINI Cooper

With the modifications to the engine that were suggested in Section 2, it is possible to bring the engine’s power to well over 200 horsepower. But there’s more where that came from, if you’re looking for more performance.
By getting deeper into the engine, we can bring the car up to as much as 300 horsepower, and add more torque in the rpm mid-range, adding to the car’s performance off the line, when overtaking other cars, and getting out of the corners. Horsepower-enhancing aftermarket parts include a plasma booster for spark plug performance, spark plug wires to take advantage of the stronger spark, an upgraded throttle body, a hotter cam shaft, and an improved cylinder head, as well as silicone hoses to improve reliability,.


Plasma Booster Ignition Upgrade
The intensity of the spark that is delivered to the cylinder by the spark determines how efficiently the air/fuel mixture in the cylinder will be ignited. The efficiency of the ignition in turn affects the engine’s power output, mileage, and smoothness of operation.
A simple “black box” can be added to the ignition system to achieve these benefits. Called a Plasma Booster, it is a power amplifier that increases the power of the primary and secondary spark circuit by nearly 100 percent to deliver a much “hotter” (more powerful) spark to the cylinder. A more powerful spark will ignite the air/fuel mixture more easily, and cause the mixture to burn more quickly. The result is more power from the fuel, more efficient use of fuel, and more consistent power from each individual firing for smoother engine operation.
Individual measurements before and after the addition of the plasma booster indicate an additional four horsepower from the engine, and ten percent better fuel economy. The Plasma Booster costs about $270, and can be added to the engine in just a few minutes without any special tools. As a nice plus, it is certified for use in MINIs by the California Air Resources Board because of its benefits in reduced emissions and better fuel mileage.

Wednesday, July 8, 2009

Front and Rear Strut Braces


The chassis of the MINI Cooper and Cooper S is well-designed and pretty stiff just as it comes from the factory, which is one of the reasons why your MINI felt satisfying to drive when you first drove it away from the dealer. Several reviewers have remarked that the car felt “as if it had been carved from one block of steel.”

However, as you start to drive the car harder, on track days or around the autocross cones, or just like tossing it around backroads corners, you might want to stiffen up the chassis just a bit more. This upgrade is one of the easiest in this book. It is accomplished simply by bolting a “strut brace” across the front of the car in the engine compartment, to connect the tops of the two front strut towers to one another.

The benefit of this brace is to stiffen the front of the car to reduce flex in the suspension. Where the stock MINI feels pretty stiff and strong in corners, the added strut brace makes it feel really solid so that the car turns into the corners more easily without hesitation. Of course, since the brace is visible to anyone looking in the engine compartment and is an attractive accessory, it certainly adds to the performance credibility of the car.

A stiff, well-constructed strut brace is desirable on a car that is running with low-profile, high-performance tires and especially desirable when installed in conjunction with a lowered suspension. A typical well-engineered strut brace will cost about $325, and can easily be installed by anyone with the right-sized wrenches in less than an afternoon.

Chassis stiffness becomes increasingly important as the MINI is used more often for serious autocrossing, and is an important element in suspension tuning. For this reason, many tuners also prefer to add a rear strut brace to the MINI before making other changes to the rear suspension of the car. Like the front suspension, this additional component is bolted on to the rear suspension mounts and extends across the car. A good rear strut brace can be purchased for about $200 and is easily installed.