Wednesday, June 3, 2009

MINI Cooper Anti-sway Bars to Reduce Understeer

In a front-wheel drive car, all of the steering and power comes from the front wheels. The usual result is that the typical front-wheel car has a tendency to under steer. If the car is going to fast, or turned too abruptly when entering a corner, the car will push ahead in a straight line, rather than turning to follow the direction of the front wheels.

Under steer is a good thing for the average driver turning the average corner, since the car is less likely to swerve or skid, should the driver turn the steering wheel too far or too fast. In fact, even most modern rear-wheel cars are engineered to have a little under steer.

However, since we want to get around the corners faster than the average driver, and we’re willing to invest some time and practice in learning to drive the car better, reducing that under steer seems like a good idea. Though it seems counter intuitive we can reduce the under steer on the front wheels by altering one component of the rear suspension, the rear “sway bar.”

The MINI Cooper S has a sway bar on the rear for just this purpose, to help tune the suspension. The rear sway bar keeps the rear wheels of the car more level as the car goes into corners. A sway bar—or as it is generally and more accurately referred to, an “anti-sway bar”—works by connecting the wheels on either side of the car to one another and to the chassis.

As the inside corner of the chassis begins to move up when the car rolls toward the outside of the turn, the sway bar transmits some of this motion to the outside rear corner. The net result is that the inside corner doesn’t go up as much, and the outside corner goes up more, than they would without the sway bar.

Again, think of the car as if it is balanced on a pin at its center. If we can keep the back end flatter on the turns so that the inside rear corner of the chassis doesn’t rise, less pressure is put on the outside front wheel and the car doesn’t push, or under steer as much. Instead, the rear end of the car comes around more easily. Instead of resisting the turn, the car will follow the line of the turn more easily.

However, the stock sway bar installed on the MINI represents a compromise between reducing chassis roll and affecting ride comfort in favor of ride comfort. It is also fixed in place, so it doesn’t allow any choice of response regardless of what you’ll be using your MINI for.

Mini Cooper Forum

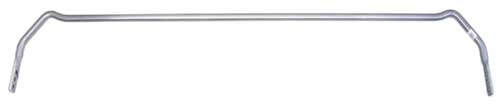
To improve on that situation, aftermarket suppliers have developed a stiffer rear sway bar that also has an adjustment range from harder to softer responsiveness. The original sway bar is 13mm thick, while one typical aftermarket sway bar is 16mm thick. The thicker bar is capable of transmitting more force from one side of the car to the other, helping the car stay level and balanced on tighter turns.

The typical dual-use adjustable rear sway bar kit, including the sway bar, connecting arms, bushings, and fasteners is available for about $250. The installation is straightforward, but does require putting the car on jack stands, and then removing the old bar and getting the new bar to slide in around the rear suspension components and wiring harness, so you may wish to have an experienced professional shop do the job for you.

Even heavier rear anti-sway bars are available for drivers who expect to spend a greater proportion of their time on the track or do serious autocross competition, might consider one of the heavier rear anti-sway bar that are also available. Some of these heavier bars have a more positive multi-position adjustment mechanism. The heavier rear bar is generally used in conjunction with the substitution of a heavier front roll bar in order to keep the car balanced from front to rear as well as side to side.

Sunday, May 31, 2009

MINI Cooper Ride Height, Camber and Toe

The angles of the wheels to the pavement and to the direction of travel are two important factors in suspension behavior and consequently the way the car will handle. Because these factors have been understood for many years, they are described with the technical terms of “camber” and “toe.”
“Camber” is the angle of the wheel when compared with a vertical line, when the car is resting on its springs. If the top of the wheel leans in towards the car when the car is sitting still, we say that the wheel has “negative camber.” On the other hand, if the top of the tire leans out when the car is sitting still, that would be “positive camber.”
The camber angle is important because it will determine how much of the surface of the tire tread is in contact with the pavement when the car is going around corners. Remember we noted that the car will sway when it is turning, which will cause the inside wheel to go up and the outside wheel to go down.
Since we want as much of the tire to be in contact with the pavement as possible during the turn, we want the wheels to have a little bit of negative camber. That way, even if the weight over a particular wheel is decreased and the angle of the wheel changes as the car tilts in the corner, the full width of the tread will still be in contact with the pavement throughout the turn.
The other angle is called “toe” and measures the extent to which the front edges of the tires point in, or point out, compared to the rear edges of the tires. If the fronts of the tires are closer together than the rear, the wheels are said to “toe in;” if the rear of the tires are further apart than the front, the tires are said to “toe out.”
The extent to which the tires toe in or toe out determines how easy it is to get the car to turn. With toe-out, the car would want to go straight rather than turn, with toe-in, the car will turn more easily.
It’s important to remember that if you change the springs and shocks to lower the car, this will also change the car’s toe and camber. For this reason, most tuners will recommend that you adjust the rear toe and camber at the same time that you lower the car and change its spring rates in order to keep the car’s handling neutral and to minimize tire wear. In addition, you may wish to make changes yourself to increase the ease with which your MINI turns-in on corners.
Two methods exist to change rear toe-in: you can use a rear camber/toe kit to replace some of the rear suspension fasteners, or you can replace the stock rear control arms with adjustable control arms. The rear camber/toe kit is less expensive than the adjustable control arms, but the adjustable control arms give you a little more control of rear camber and toe and are easier to adjust.

Tuesday, May 26, 2009

MINI Cooper Performance Spring Kit and Shock Upgrades

Two suspension components have the most direct effect on ride quality and handling performance, the springs and the shocks. The length and resilience of the springs determines how easily and how far the body will move when the wheels hit a bump or when weight is transferred in acceleration, braking, or cornering. The shock absorbers reduce the amount of rebound on the springs, helping the body to return to equilibrium after it bounces.
Let’s start with the springs. Because most car owners put more emphasis on ride comfort than on cornering and acceleration performance, most cars are equipped with fairly soft springs that are designed with a good amount of spring travel. The basis Mini Cooper would be considered in this category.
The Mini Cooper S, with its sport suspension (optional on the Mini Cooper) does use heavier (less-resilient) springs with a bit less travel, but the engineers are still assuming you just want good street handling, and aren’t going to want to go a little fast in the twisty bits or take the car on a track or autocross course.
For these purposes, a stiffer spring and lower ride height will be in order. With a stiffer spring, the car won’t cushion you as much on the bumps, but more important, it won’t sway as much on corners, or shift back and forth as much on acceleration and braking. With a shorter spring, the center of gravity will be a little lower, also reducing the amount of side-to-side or front-to-rear body roll.
Good high-performance spring kits are readily available in the aftermarket. These improved spring kits will help your car maintain its stability when starting, stopping, and turning without wallowing around. These kits won’t make your car ride so rough that your passengers will complain, but they will definitely increase the predictability of the car in the corners and help reduce your lap times. A typical upgraded spring kit sells for less than $250.
While most of the good performance spring kits will work with the original equipment shocks, you might want to consider upgrading your shock absorbers at the same time. The shock absorbers work together with your springs so that the car doesn’t just bounce up and down and up and down every time it sways or hits a bump.
Actually, the term “shock absorber” isn’t quite accurate, since the springs actually absorb the shocks from uneven road surfaces, while the shock absorbers help counter the effect of the springs. The English call them “dampers” which is a more accurate term.
The shock absorbers in the MINI are long tubes that are installed between the wheel and the chassis in parallel with the springs. Inside the outer tube is a piston with a special valve that allows fluid to move from the main tube into the piston as the shock absorber compresses and then move back into the main tube at a slower rate when the shock absorber extends.
The shock absorber works by compressing easily when the spring compresses, but then reducing the rate at which the spring expands. So, instead of continuing to oscillate up and down as it would if only the spring were in between the chassis and wheel, the chassis comes back to a neutral position after only one or two movements.
Like original equipment springs, original equipment shocks are designed to do their job with emphasis on comfort, rather than performance. They damp the spring movement just enough to avoid making passengers seasick, but not enough to give a harder ride. To improve your handling, you’ll want even less oscillation so that the car will return to a neutral position more quickly.
By installing performance shocks, you still get some springing action to absorb the bumps and weight changes, but the car will move less and return to neutral more quickly after acceleration or braking, or in between corners. A set of performance shocks designed specifically for the MINI, such as the one by Koni, is a good complement to shorter, stiffer performance springs. One MINI aftermarket catalog offers the Koni shocks for front and rear for a total of about $690, or the combination of performance springs and Koni shocks for a total of $875.
Spax makes a set of “coil-over” shocks that are an alternative to replacing the springs and shocks separately. With this kit, performance springs are wrapped around the shocks, hence the name, and the combined spring and shock is mounted after removing both the stock spring and stock shock at each corner. This alternative is more expensive that installing springs and shocks separately, typically selling for about $1300.
Coil-over kits can certainly be used to improve the handling on street cars. However, they are more likely to be installed by owners who expect to use their MINI frequently on the track or autocross course, since they are available in different spring rates and do offer the means to adjust ride height at each corner.
Different spring rates will be appropriate, depending on the experience of the driver and the frequency with which the car will be used in competition. Springs that are closer to stock firmness will be appropriate for the person who doesn’t compete too often, and also wants to use the car for street use. On the other hand, if the MINI is only going to be used for competition and the driver is quite experienced, the preference will be for a much firmer spring.
By adjusting the ride height at each corner, the owner can balance corner weights to compensate for other changes that have been made in the car, since balance is very important in tuning the car’s handling for the race track.

Tuesday, April 14, 2009

Better Handling for Road, Track or Autocross in a MINI Cooper

In the second section of this book, we were particularly complimentary regarding the MINI Cooper's stock suspension, noting that it will reward a good driver and can be well down the priority list of things to work on for improved performance. Now, with a few days of track time under your belt, or maybe a day or two out on the autocross course, and lots of corners that you have been practicing to go around just right, you may be ready to consider tweaking the suspension a bit for better handling performance.
Once again we’re back to trade-offs. For the average driver, with average passengers, the ability of the car to absorb bumps without rattling the dentures of gran’pa in the back seat is at least as important as how fast the car will get around corners.
As a result, when designing the shocks, springs, and suspension on any car, engineeers are going to err at least slightly on the side of a soft ride. The trade-off is that the car will lean more when going around corners.In moderate corners, as the car leans, that weight transfer is going to take weight off one of the powered wheels, and push the other wheel more firmly against the pavement, causing it to scrub a little bit. Push that car too hard through a corner and that lean could even turn into a roll. Either way, you’re not going to go around the corner as fast as you would if the car didn’t lean so much.
In the interests of improving your potential to get around corners, you may want to think about changing the trade-off, so that the car may not ride as softly going over bumps, but it will lean less going around corners. To do this, you’ll want to consider replacing the springs, upgrading the shocks, adding a rear sway bar, and changing the rear control arms.
Each of these suspension modifications can be installed separately, if your budget is limited, and they can be installed in the order in which they’re discussed. If you can swing the expense, you can save money and gain maximum improvements in handling, by installing all the components at the same time.

Thursday, April 2, 2009

MINI Cooper Lightweight Flywheel


If you are considering changing the clutch and your budget will tolerate the added cost, you may also wish to change the flywheel at the same time.
The flywheel on an automobile engine is a large disc at the rear of the engine that has a great deal to do with how smooth the engine runs. It is fastened to the end of the crankshaft, the shaft that is rotated as the pistons go up and down inside the cylinders. The momentum of the flywheel is used in order to smooth out the operation of the engine as its speed changes.
As the engine builds up speed, part of its energy is used to spin the flywheel, which being large and heavy, requires some time to build up momentum. Once the flywheel is spinning, that momentum keeps it spinning for a short time, even after you let off on the gas and the engine is no longer producing as much power. The flywheel keeps the engine from speeding up or slowing down too abruptly, which in turn smooths out the car’s changes in speed, keeping your passengers more comfortable.
On most brands of automobile, the flywheel consists of a single metal disc with a center hub that clamps to the crankshaft. It also has a toothed gear around the outside edge against which the starter gears engage when you press the starter button.
For smoother performance in engine and clutch operation on the MINI Cooper S, BMW engineers have taken the basic flywheel design one step further. The MCS flywheel is what is known as a “dual-mass” flywheel. Instead of using just one disc, this flywheel consists of two discs with a spring mechanism in between. The spring mechanism allows the disc fastened to the crankshaft to rotate as much as 70 degrees, almost a quarter of a turn, before the disc that engages the clutch is put into motion.
This design permits smoother clutch engagement, and also damps out much of the noise and vibration that is generated between the clutch and flywheel. Here again, the designers have balanced comfort against performance, giving up a little performance to get a little comfort, which the average driver and passenger wants.
However, if you want to push the balance a little towards performance, and are willing to live with a bit more noise, especially when the car is not in gear, you can replace the stock flywheel with a lightweight single-disc flywheel. An aftermarket aluminum flywheel can weigh less than half the weight of the stock flywheel without risking engine longevity.
With a lighter flywheel, you’ll get quicker acceleration and deceleration. These are two positive benefits if you’re trying to get around an autocross course or track as quickly as possible, since best time of day will go the the car that can speed up on the straightaways faster, and slow down into the turns more quickly.
Since it seems as if every drivetrain modification in the typical tuner catalog promises increased horsepower, we should probably make sure that you understand that lightening the flywheel does not increase horsepower, since it doesn’t alter the engine operation. It simply increases the responsiveness of the car when you get on and off the throttle. Many drivers will mistake this responsiveness for added horsepower. The lightened flywheel will help reduce your lap times, and make driving more fun, but it won’t increase horsepower, grow hair on that bald spot, or perform any similar miracles.
A lightweight aluminum flywheel will cost approximately $500. Since it is necessary to remove the clutch to replace the flywheel, if you’re already substituting a high-performance clutch, it is considerably less expensive in the long run to change the flywheel at the same time.

Thursday, March 26, 2009

Performance Clutch Kit

The clutch is that essential little piece of friction material that connects all that power being generated by the engine to the transmission and driveshaft that make the wheels go round. It’s surprising to think that all that power is transmitted through two discs pressed up against one another: no chains, no gears, just pressure and friction.
On the other hand, if the car didn’t have a clutch, there would be no way of disconnecting the running engine from the transmission so that you could change gears or, for that matter, stop the car while keeping the engine going. For a quick primer in how a clutch operates, check out www.howstuffworks.com/clutch.htm.
Yet, it’s the contact between the two plates, the springs that hold the plates together, the friction material on the clutch plate, and the release mechanism that pulls the plates apart that can make all the difference. These parts determine how quickly and smoothly the plates separate to allow a quick gear change, and how quickly and tightly the plates go back together to put the power back to the wheels. And that speed and efficiency makes a big difference in performance and driving sensations when the car is pushed close to its limits on the track, in and out of the cones on an autocross course or on the curves of a scenic backroad.
Like many other performance parts, clutches represent trade-offs between price and performance, and between speed and comfort. The clutch with which the car is equipped from the factory is a good component, but is built to a budget. More important, it is built with the average (or below-average) driver in mind, so its design and choice of materials err in favor of comfort and longevity, rather than performance and speed.
If you’re thinking about using your MINI Cooper or Cooper S in a more enthusiastic way than that average driver, you may be willing to pay spend some money to improve the performance of your clutch. Of course, you should also be willing to accept the need to be more quick and precise with your gear changes than that average driver so that you don’t start off, or go through gear changes, in neck-snapping fits and starts.
If you are, a performance clutch kit may be your ticket. But it isn’t a simple, “either-or” choice, since there are several levels of upgrade available. One typical catalog, for example, offers a “high-performance street kit,” a “casual autocross kit,” a “casual drag race kit,” a “race kit” and a top-of-the-line “high performance flywheel/clutch system.”
Choosing the one that’s right for you is largely determined by what you want to do with your car. Aside from the top-of-the-line system, the prices aren’t significantly different for various applications. These kits sell in the range of $400 to $600, not including installation.
All of the kits consist of the clutch disc that is pressed against the flywheel when the clutch is engaged, the pressure plate that pushes the clutch against the flywheel, the throwout bearing which pushes the clutch disc away from the flywheel when the clutch pedal is depressed, and the alignment tool needed to install the parts.
It is the type of friction material that makes the difference among the clutches designed for different applications. In the “street kit” level, a steel-backed woven organic material is used, that allows a small amount of slippage before hooking up. This slippage, though less than that of the stock clutch disc, will smooth out the clutch engagement when starting off from a stop. Allowing the clutch to slip slightly can be important in situations such as starting from a stop on a hill.
The higher performance clutches will engage more positively, since the intention is to get off from a stop as quickly as possible, and spend as little time as possible with the flywheel spinning but not connected to the transmission while shifting gears. On these clutches, kevlar, carbon or ceramic materials are used on the clutch disc, which allow for less slippage than stock disc materials as the clutch is engaged.
At the level of performance and activities being discussed in this chapter, where you’re using the car as a daily driver, but taking it out occasionally for a track day, autocross, or long-distance tour, you will probably be quite happy with a high-performance street kit. The organic disc material will provide more grip and quicker engagement and disengagement than the stock clutch, but still allows a little slippage.

Sunday, March 22, 2009

Short Shifter the MINI Cooper for Shifting Satisfaction

Short Shifter for Shifting Satisfaction
One of the most satisfying aspects of performance driving is to run the car up through the gears with a series of crisp flicks of the shift lever. In the stock MINI, the transmission and gear shift linkage are designed to make this process fairly seamless, but the “throws” — the distance the shift lever has to be moved between gears — are fairly long.
The problem here is that while you are moving the shift lever from one gear position to the next, you have to have the clutch pedal in and the clutch disengaged. That means that the car is simply coasting. And coasting means you’re wasting time.
If it was possible to shorten the distance that your hand has to move to shift gears, then the time lost coasting between gears would be reduced. And that means you can get back on the throttle sooner during each shift of gears. It also means that your “heel and toe” will work more effectively on downshifts, because there will be a shorter period of time between blipping the throttle and actually changing down into the next lower gear.
Reducing the shifter distance is a straightforward improvement, taking advantage of the principles of leverage. All that is required is installation of an extension on the lower end of the shift lever. This changes the leverage between the shift lever and the rod that connects it to the transmission, so that you don’t have to move your hand as far to make the gear change. This modified gear lever is often called a “short shifter.”
A “short shift kit” to make the change is available from aftermarket suppliers for approximately $90. This kit consists of the extension to the shift lever and a modified dust cover plate for the box that encloses the shift lever mechanism under the car.
Working underneath the car, the mechanic removes the original dust cover plate, disconnects the shift rod, adds the extension, makes some alterations to the shift lever case, and then installs the new dust cover plate. The mechanical work is not complicated, but it does involve raising the car, removing the exhaust system and modifying the the case. Most owner will prefer to leave the work to an experienced modification shop.